As mentioned in the intro article, the first task will be to set up the application’s structure and define how the various components will communicate.
Multitasking Link to heading
Most embedded systems will implement multi-tasking by rapidly polling each system within an infinite loop.
loop {
    poll_comms();
    poll_motion_planning();
    poll_io();
    poll_machine_events();
}
A motion controller will normally spend most of its time polling, but there are places where polling isn’t appropriate. For example, accurate movement of a stepper motor relies on sending pulses at very precise times. Another scenario is in the handling of communication, where waiting for the next poll to read a byte may result in missing part of a message.
To deal with this embedded systems use interrupts, callbacks which will preempt the normal flow of execution to handle an event. These callbacks, referred to as Interrupt Service Routines, will then do the bare minimum required to handle the event so execution can be resumed as quickly as possible.
For example, this may happen by saving the event to memory (e.g.
“received 0x0A over serial”) so it can be handled by the appropriate
system when it is polled next.
Inter-System Communication Link to heading
Now we know that systems will do work by being polled frequently, lets think about how they’ll interact with the rest of the application.
In general a system works by reading state, evaluating some logic using that state, then propagate the results of that logic by sending messages to the rest of the system (or even to the real world via IOs).
Systems will be polled infinitely and are the top-most level of logic so they
must handle every possible error, even if that is just done by entering a fault
state. It doesn’t make sense for poll() to return an error (who would
handle the error?)… Or anything, for that matter.
From that, we’ve got a rough image of what a system may look like:
trait System<In, Out> {
    fn poll(&mut self, inputs: &In, outputs: &mut Out);
}
Keeping Track of Time Link to heading
An important responsibility for a motion controller is being able to change
the value of something over time (hence the motion in motion controller).
Timing is used all over the place and each motion controller will have its
own way of tracking the time (remember that there may not necessarily be an
OS meaning we can’t depend on std::time::SystemTime), so lets pull this
out into its own trait.
use core::time::Duration;

trait Clock: Sync {
    /// The amount of time that has elapsed since some arbitrary point in time
    /// (e.g. when the program started).
    fn elapsed(&self) -> Duration;
}
A Clock will be shared by almost every system and a reference may be passed
across threads. Hence the &self in elapsed() and the Sync bound.
Extracting the concept of time into its own trait is especially handy during testing. It can also be used to make time run faster than the usual 1 second per second (e.g. fast-forward).
Layers Link to heading
To reduce coupling and make things more manageable, we’ll take advantage of Cargo Workspaces to break the project into layers.
At the very bottom is our Hardware Abstraction Layer (HAL). This defines the various platform-agnostic interfaces used by the application.
Next we have the various drivers (e.g. stepper motor control) and systems (e.g. communication and motion planning). These are built on top of the HAL and are where most of the application is implemented.
At the very top is the application itself, an in-browser simulator in our case. Its role is to glue the various components together, performing the necessary setup before polling the various systems ad infinitum.
Our app’s dependency graph may look something like this:
Hello, World! Link to heading
Now we’ve got a better idea of how the application might be structured it’s time to stub out enough of the frontend to see things run.
I won’t explain each step in setting up a Rust WASM project (the Rust and WebAssembly book already does a great job at that!), but here’s the gist of it:
$ cargo generate --git https://github.com/rustwasm/wasm-pack-template --name sim
 Creating project called `sim`...
 Done! New project created /home/michael/Documents/adventures-in-motion-control/sim
$ cd sim && wasm-pack build
$ ls pkg
 aimc_sim.d.ts aimc_sim.js aimc_sim_bg.d.ts aimc_sim_bg.wasm package.json
 README.md sim.d.ts sim.js sim_bg.d.ts sim_bg.wasm
$ cd ..
$ npm init wasm-app frontend
 npx: installed 1 in 2.523s
 🦀 Rust + 🕸 Wasm = ❤
$ cd frontend && yarn install
$ yarn add ../sim/pkg
$ yarn run start
 yarn run v1.15.2
 webpack-dev-server
 ℹ 「wds」: Project is running at http://localhost:8080/
 ℹ 「wds」: webpack output is served from /
 ℹ 「wds」: Content not from webpack is served from /home/michael/Documents/adventures-in-motion-control/frontend
 ℹ 「wdm」: Hash: 93fc66658e148c72a97a
 Version: webpack 4.39.3
 Time: 467ms
 Built at: 09/02/2019 7:24:22 PM
                            Asset       Size  Chunks             Chunk Names
                   0.bootstrap.js    3.4 KiB       0  [emitted]
 8e8fa9289c240ac706a1.module.wasm  872 bytes       0  [emitted]
                     bootstrap.js    367 KiB    main  [emitted]  main
                       index.html  297 bytes          [emitted]
 Entrypoint main = bootstrap.js
The project now looks something like this (commit 69e68832):
- adventures-in-motion-control/
- Cargo.toml
- hal/
- src/
- lib.rs
- clock.rs
- system.rs
- src/
- sim/
- src/
- lib.rs
- utils.rs
- src/
- frontend/
- package.json
- bootstrap.js
- index.js
- index.html
I normally use cargo-watch to recompile and run my project’s
test suite whenever a change is made, but doing the same with wasm-pack and
yarn takes a little extra effort. Instead, we’ll need to work with
watchexec directly.
$ watchexec \
    # Clear the screen every time
    --clear \
    # The webpack dev server will still be running, make sure it is restarted
    --restart \
    # These files are changed when running  `wasm-pack` and `yarn add`
    --ignore 'sim/pkg/*' \
    --ignore 'frontend/package.json' \
    --ignore 'frontend/yarn.lock' \
    --ignore 'frontend/node_modules/*' \
    # The actual command to execute whenever something changes
    'wasm-pack build sim && cd frontend && yarn add ../sim/pkg && yarn start'
Webpack won’t automatically detect the sim/pkg/ directory’s contents have
changed (I’m guessing the folder’s contents are copied to node_modules/?).
That means we need to manually run yarn add ../sim/pkg every time the WASM
code changes.
Lets stub out an App type. This will contain the world’s state, with a
reference being passed to the JavaScript frontend so it can be periodically
polled.
// sim/src/app.rs

use aimc_hal::{clock::Clock, System};
use wasm_bindgen::prelude::*;

#[wasm_bindgen]
#[derive(Debug)]
pub struct App {
    inputs: Inputs,
    browser: Browser,
}

impl App {
    pub fn poll(&mut self) {
        self.browser.log("Polling...");
    }
}
The Input and Browser types are what hooks our App up to the rest of the
world. They’ll implement the various HAL traits so our systems are able run.
For now, the Input just contains a Clock based on JavaScript’s
performance.now() function.
// sim/src/inputs.rs

use crate::PerformanceClock;
use aimc_hal::clock::{Clock, HasClock};
use std::time::Duration;

#[derive(Debug, Clone, Default)]
pub struct Inputs {
    clock: PerformanceClock,
}

impl HasClock for Inputs {
    fn clock(&self) -> &dyn Clock { &self.clock }
}
The PerformanceClock itself isn’t overly interesting. It just uses web-sys
to call the native JavaScript function and converts the the result to a
Duration.
// sim/src/clock.rs

use aimc_hal::clock::Clock;
use std::time::Duration;

/// A [`Clock`] which uses the browser's native `performance.now()` function
/// to keep track of time.
#[derive(Debug, Clone, Default)]
pub struct PerformanceClock;

impl Clock for PerformanceClock {
    fn elapsed(&self) -> Duration {
        let perf = web_sys::window()
            .expect("The window always exists")
            .performance()
            .expect("The window should always have a performance timer");

        let now_ms = perf.now();
        let secs = (now_ms / 1000.0).floor();
        let secs = secs as u64;

        let nanos = ((now_ms / 1000.0).fract() * 1e9).floor();
        let nanos = nanos as u32;

        Duration::new(secs as u64, nanos as u32)
    }
}
The Browser is also pretty empty at the moment.
// sim/src/browser.rs

use wasm_bindgen::JsValue;

#[derive(Debug, Default)]
pub struct Browser;

impl Browser {
    pub fn log(&mut self, msg: &str) {
        let msg = JsValue::from(msg);
        web_sys::console::log_1(&msg);
    }
}
We also need to expose functions which will let JavaScript create the world and poll it.
// sim/src/lib.rs

#![no_std]

mod app;
mod browser;
mod clock;
mod inputs;

pub use app::App;
pub use browser::Browser;
pub use clock::PerformanceClock;
pub use inputs::Inputs;

use wasm_bindgen::prelude::*;

#[wasm_bindgen(start)]
pub fn on_module_loaded() {
    // wire up pretty panic messages when the WASM module is loaded into memory
    #[cfg(feature = "console_error_panic_hook")]
    console_error_panic_hook::set_once();
}

/// Creates a new world, initializing the various systems and wiring up any
/// necessary interrupts.
#[wasm_bindgen]
pub fn setup_world(fps_div: &str) -> App {
    let browser = Browser::default();
    let inputs = Inputs::default();

    Ok(App::new(inputs, browser))
}

/// Poll the application, running each system in turn and letting them make
/// progress.
#[wasm_bindgen]
pub fn poll(app: &mut App) { app.poll(); }
Now the sim crate is exposing setup_world() and poll(), we can wire it
up to the browser.
Something to note about JavaScript running in a browser is that an infinite loop will prevent anything else from executing, locking the entire window up. This isn’t great.
The trick to implementing an infinite “loop” in JavaScript is to use
window.requestAnimationFrame() to schedule some animate() function
to be called, then make sure animate() calls requestAnimationFrame(animate)
so it’ll be called again.
// frontend/index.js

import * as wasm from "aimc-sim";

let world;

function init() {
    console.log("Initializing the world");
    world = wasm.setup_world();
    requestAnimationFrame(animate);
}

function animate() {
    wasm.poll(world);
    requestAnimationFrame(animate);
}

init();
Going to the dev server (http://localhost:8080/) should show an empty page, however if you open up the developer console you should see something like this:
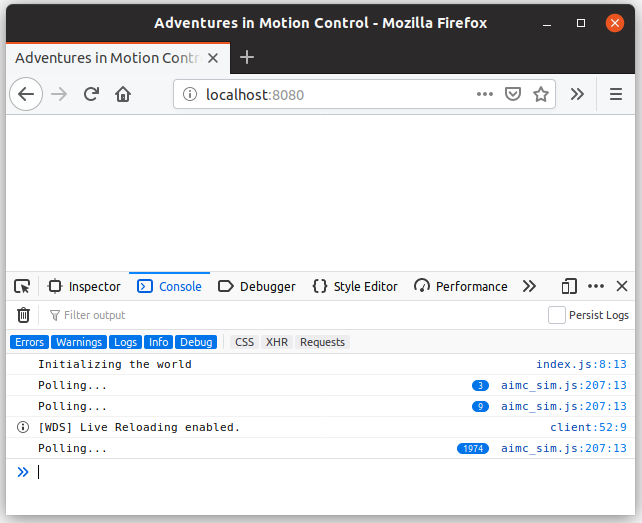
It may not look impressive, but to just get that “Polling…” message we needed to:
- Compile the
simcrate to WebAssembly - Import that WebAssembly from a JavaScript application and make sure JS can call our WASM functions
- Bundle the JavaScript and WebAssembly together and send it to a browser
- Initialize the world when the window is first loaded
- Call
wasm.poll()from an JavaScript function that is called whenever the browser paints - Poll the underlying
App, using in a set of dummyInputsand aBrowserobject - Invoke that browser’s
log()method - Call back into JavaScript’s
console.log()function
The Next Step Link to heading
Now the main application is wired up and we can run code in the browser the next step is to add some systems to our application.
A relatively easy, yet important, component is some sort of FPS counter. Ideally
there’ll be a bit of text in the corner showing the number of poll()s per
second and the average duration. That way we can get a better feel for our
simulator’s performance characteristics.